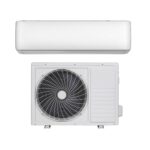
Mini-split systems, which capitalize on the latest heat pump technology, offer an innovative solution for heating and cooling your home. These systems, especially popular in the form of ductless mini-splits, provide an efficient alternative to traditional HVAC units that necessitate extensive ductwork.
Versatility and Cost-Effectiveness
Ductless mini-split systems shine in their versatility. They are an excellent choice for climate control in various spaces such as bedrooms, home offices, additions, converted attics, and garages. For those needing cooling solutions only, mini-split AC systems serve as dedicated air conditioners.
Installation Guide Overview
This guide aims to walk you through the essentials of installing a mini-split air conditioner. Whether you’re looking to enhance a specific area of your home or embark on a full-scale installation, this guide provides crucial insights.
Important Safety Considerations
Safety is paramount when dealing with HVAC systems. Installing a ductless mini-split system involves handling refrigerant lines and establishing high-voltage electrical connections. It’s important to note that in some regions, such tasks are legally required to be performed by licensed professionals. Always check with local authorities regarding licensing and permits before starting the installation.
Adhering to Specific Guidelines
Each mini-split system comes with its unique set of installation instructions. Variations exist across different manufacturers, making it essential to thoroughly review the manual provided with your specific unit. This ensures a correct and safe installation process, tailored to the nuances of your chosen system.
Embarking on the installation of a heat pump mini-split system marks a step towards efficient, flexible, and cost-effective home climate control. By following this guide, and adhering to safety and legal standards, you can successfully install a system that enhances the comfort and functionality of your living space.
Table of Contents
Choosing the Right Mini Split System for Your Space
Understanding the Components
When considering a DIY mini split installation, it’s crucial to understand the system’s components. A typical setup includes an outside condensing unit, an indoor air handler, refrigerant lines connecting these units, and the necessary electrical wiring. While you might manage to install the air handler and condenser yourself, the refrigerant line usually requires professional installation due to the need for cutting and charging.
DIY mini splits are available with pre-charged refrigerant lines, eliminating the need for professional charging. These systems are primarily designed for single-room temperature regulation and are not suited for larger areas.
Identifying the Right System for Your Needs
Selecting the appropriate mini split system depends on your specific requirements:
Single-Zone Ductless Mini Splits: Ideal for individual areas like kitchens, bedrooms, or garages, these systems comprise one air handler and one condenser unit. They are the simplest to install and are well-suited for small spaces.
Dual-Zone Ductless Mini Splits: These systems have two air handlers connected to a single condenser unit, making them suitable for regulating temperatures in two separate areas. They’re a good fit for homes needing climate control in multiple but limited spaces.
Multi-Zone Ductless Mini Splits: For heating or cooling several distinct areas, multi-zone systems can support multiple air handlers from one condenser. These are more complex in installation, and it’s essential to closely follow the manufacturer’s instructions for these types.
Sizing Your Mini Split Correctly
Choosing the right size for your mini split is crucial for efficient operation. This decision is based on the British Thermal Unit (BTU) output of the system. Common choices include 2-ton and 4-ton mini split systems, catering to a range of space sizes. To determine the appropriate size, measure your space for accurate square footage and consult manufacturer guidelines on BTU sizing to ensure your chosen system can adequately manage the temperature of your area.
Selecting the right mini split system involves understanding the specific requirements of your space and the technical aspects of the systems available. Whether it’s a single-zone, dual-zone, or multi-zone system, ensuring the correct sizing in terms of BTUs is essential for effective and efficient temperature control. Always refer to the detailed guidance provided in the product manuals and consider professional assistance for complex installation steps.
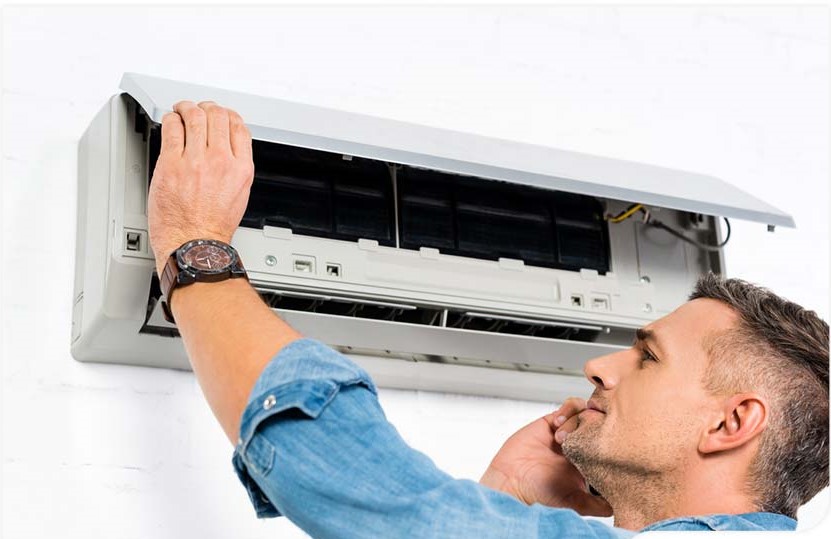
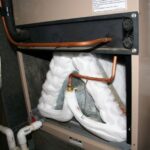
Installing the Indoor Unit of a Mini Split System
Installing evaporator of the mini split system in doors
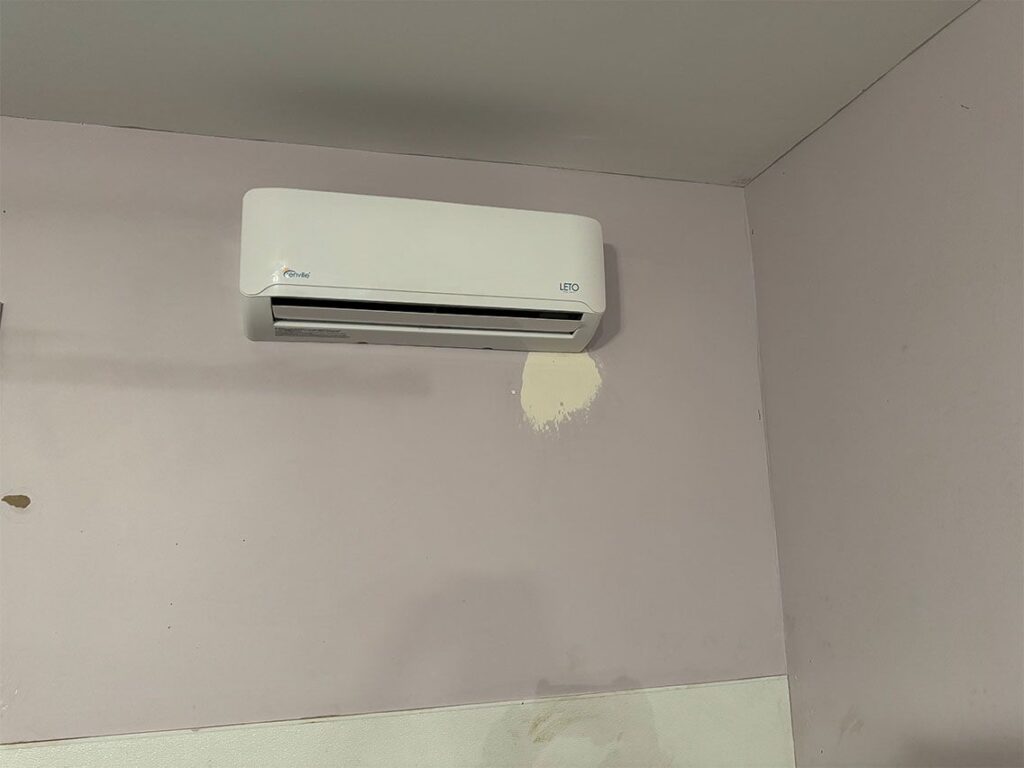
Selecting the Right Wall
Location: Choose a wall that faces outdoors. Ensure there’s enough space for the air handler, avoiding obstructions like furniture, shelving, or lighting fixtures.
Height: Install the air handler at least six feet above the floor.
Avoid Direct Sunlight: Don’t install the unit in direct sunlight or near other heat sources to ensure efficient temperature monitoring.
Clearance: Maintain recommended clearance between the air handler and the ceiling as per the manufacturer’s guidelines.
Exterior Obstructions: Ensure the exterior side of the wall is also free from obstacles for running refrigerant lines.
Nice position for the Evaporator indoor
Preparing for Mounting
Locating Studs: Use a stud finder to locate studs in your chosen area. Avoid wires, pipes, or ducts hidden inside the wall.
Mounting Bracket Alignment: Ensure the mounting bracket aligns with the studs (typically 16-inch or 12-inch on center). Plan the large hole (about 3 inches) for the refrigerant lines, ensuring it avoids the studs.
Positioning the Bracket: Hold the bracket against the wall, use a level to ensure it’s straight.
Marking Drill Points: Mark the mounting holes using a pencil.
Drilling Pilot Holes: Drill pilot holes slightly smaller than your screws. If studs aren’t available, use hollow wall anchors suitable for the air handler’s weight.
Drilling for Refrigerant Lines
Hole Location: Typically, drill the hole in the lower left or right corner of the mounting bracket, depending on where the lines exit the unit. Consult the manufacturer’s manual for specifics.
Hole Size and Angle: Use a 2- to 3-inch hole saw bit, angling slightly downward for better drainage.
Connecting Control Wires and Refrigerant Lines
Control Wire Connection: Follow the specific instructions for your model to attach the control wire, usually involving removing a back plate.
Preparing Refrigerant Pipe: Unfold the refrigerant pipe and bundle it with the control wire and drainage tubing using electric tape.
Inserting Pipes and Wires: Guide the bundled pipes and wires through the drilled hole.
Securing the Indoor Unit
Mounting the Unit: Lift the indoor unit, feed the bundled pipes and wires through the hole, and securely attach the unit to the wall mount using the provided hardware.
Final Notes
Double-Check Alignment: Ensure the unit is perfectly level for optimal drainage and functionality.
Refer to the Manual: Always consult the installation manual for specific instructions related to your mini split model.
Safety First: If unsure about any step, consider consulting a professional, especially for handling refrigerant lines and electrical connection
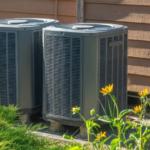
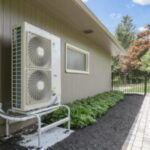
Installing the Outdoor Unit of a Mini Split System
Choosing the Right Location
The placement of the outdoor unit is a critical step in the installation process. You have several options:
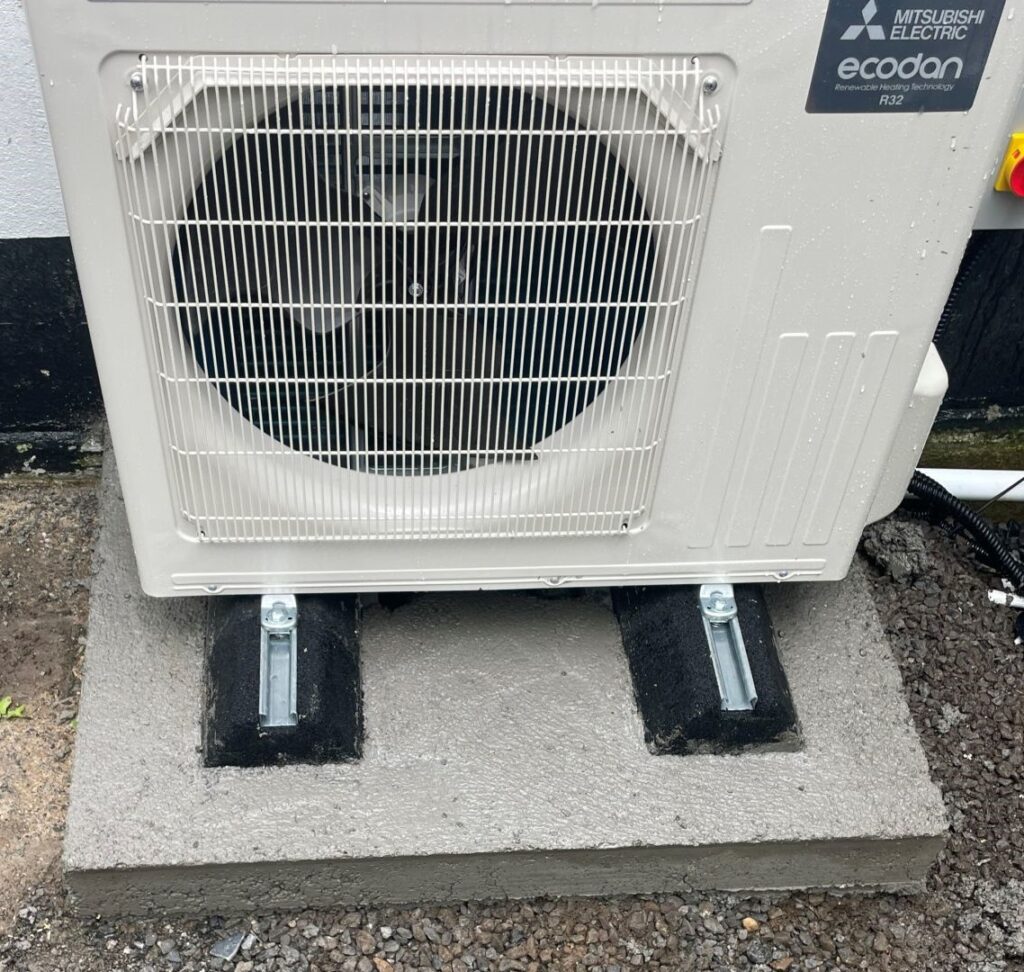
Ground Placement: If you opt to place the unit on the ground, ensure it’s secured to a stable pad. This pad can be a pre-made one or a custom concrete pad you create.
Rooftop or Wall Mounting: Alternatively, the unit can be installed on a rooftop or mounted on an outside wall using specialized hardware.
Condenser, Out door unit installed on a concrete pad on the ground
Preparing for Installation
Once you’ve selected the appropriate location:
For Ground Placement: Position the unit on the pad. The pad should be level and sturdy enough to support the weight of the unit.
For Rooftop/Wall Mounting: Ensure the hardware is properly secured and can support the unit’s weight.
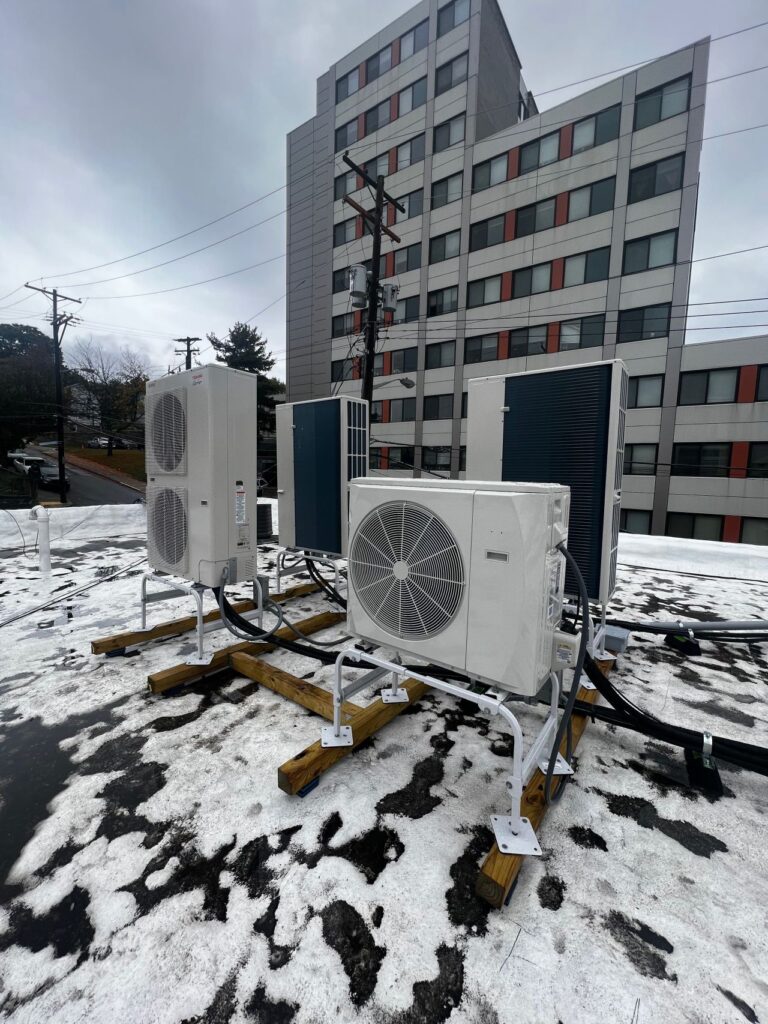
out door units installed on rooftop
Connecting Pipes and Tubing
For Pre-Charged DIY Kits: Carefully connect the pre-charged lines from the indoor unit to the outdoor unit. It’s crucial not to cut these lines, as it can be dangerous and release refrigerant.
For Non-Precharged Systems: If the system requires cutting and charging the lines, this step must be performed by a professional.
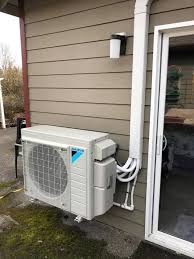
Attach the pipes, tubing, and wires to the exterior wall. This not only secures them but also can provide a more aesthetically pleasing appearance. You can use covers to conceal these connections.
Making the Final Connections
Connect the appropriate pipe joint to the line set on the back of the outdoor unit.
Connect the multi-conductor wiring that runs between the indoor and outdoor units. This step might require a torque wrench for a secure fit.
well secured outdoor unit wires and tubes
Tips for Successful Installation
Always follow the manufacturer’s specific instructions for your model.
Ensure all connections are tight and secure to prevent leaks or operational issues.
If you’re not confident in handling refrigerant lines or electrical connections, it’s advisable to consult a professional.
Regularly check the stability and integrity of the installation, especially if the unit is mounted in a location exposed to environmental elements.
Follow Up with a Professional
follow up by HVAC professional
Ensuring a Safe and Effective Installation
After connecting the indoor and outdoor units, it’s highly recommended to involve professionals to handle specific aspects of the installation. This ensures safety, efficiency, and compliance with regulations.
Professional A/C and Heating Provider
Connection Verification: Professionals will thoroughly inspect and verify the connections between the indoor and outdoor units to ensure they are secure and leak-free.
Handling Dangerous Substances: Professionals are equipped to handle potentially hazardous materials such as dry nitrogen and refrigerant, preventing risks associated with improper handling.
Licensed Electrician for Powering the Unit
Electrical Wiring: A licensed electrician is essential for the electrical components of the installation.
Running Power Lines: They will run a 220-volt (or sometimes 120-volt) line from the breaker panel to a disconnect switch and then connect it to the unit.
Expertise in Mini Split Systems
Complexity of Installation: Mini split systems can be complex, and professional expertise ensures a successful and trouble-free installation.
Caution for DIYers: Even experienced individuals should proceed with caution and take their time during installation.
Additional Recommendations
Consider Wall-Mounted Ductless Air Conditioners: For cooling needs in smaller rooms, a wall-mounted ductless air conditioner could be a viable alternative.
Explore Mini Split Installation Services: If assistance is needed, especially for installing a mini split heat pump, professional installation services can provide the expertise required.
Fast Supplies: Home improvement stores like The Home Depot offer online ordering and delivery services for quick access to necessary supplies.
By following up with professionals, you ensure the reliability, safety, and optimal performance of your mini split system, making it a worthwhile investment in your home’s comfort.


")
 HVAC, hvac. Heating, Ventilation, and Air Conditioning. | Definition, meaning, working principle and all things you need to know.
 The Working Principle of HVAC Systems: Comfort and Air Quality
 Meaning of BTU. What are btu’s and all things you should know about BTU in air conditioning (AC)
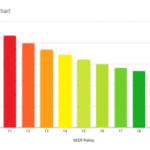 What is SEER? Meaning. | seasonal efficiency rating
 Freezing air conditioner coils (AC). | HVAC frozen coils
 Heat Pump vs. Air Conditioner: Cost Comparison
 Split System vs. Heat Pump: HVAC Comparison
 Why is my air conditioner running but not cooling the house?